Setup AZURE credential for scanning
- Creating the application for scanning
- Login to your Azure portal
- Go to
App registrationthen click onNew registration - Now give an app
nameand selectSupported account type:Accounts in this organizational directory only (<your_company_name> - Single tenant)and leave theRedirect URI (optional)option empty and clickRegister
- Configuring app client secret
Now navigate inside the app that we created in the previous step by
App registration-><your_app_name>Then click on
Add a certificate or secret->New client secretNow enter a description and the Expires date of the secret the click on
AddNow copy the
valueandSecret IDstore securelyAfter successfully creating the application copy and store the below information
Application IDValue(You'll find this on applicationCertificates & secretssection)Directory IDSubscription ID
- Now we've to assign some Role assignment to the app so that it can read our cloud configuration
- Now navigate to
Subscriptionand select your subscription - Then select
Access control (IAM)from the left sidebar - Now click on
Add->Add role assignment - Search for the
Security readerrole from the list select that and clickNext - Click
Select membersand type your app name and searchselect(Make sure you search your app name unless you wouldn't see your app on that list) - Then finally click on
Review + Assign
- Read more about this on here
- Now let's add the credentials to the MeghOps platform
- Goto https://app.meghops.com/auth/login and login with your account
- Now go to settings by clicking the top right corner ( Profile avatar) then
Settings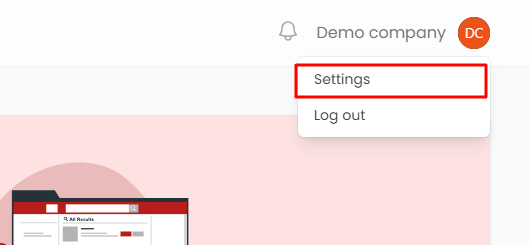
- From the
settingspage go toCloud accountsthen click onAdd credential.

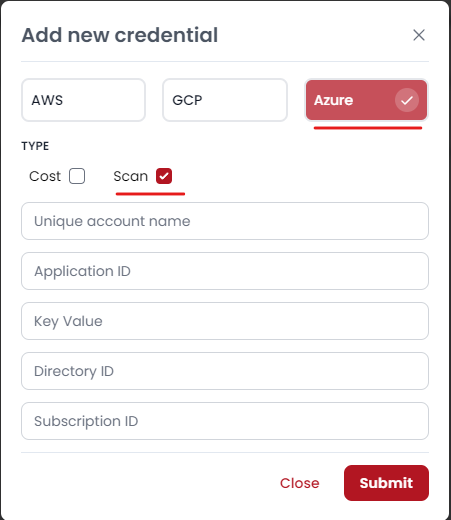
- Now from this dialog select
Azureand checkmark onScanNow put your Azure credentials then click onSubmit